Friday 13 March 2015

SPPU IT-2012 Pattern Sem 4 Question Papers

MAY-2014 2012 Pattern 

Click below to download


DEC-2014 2012 Pattern 

Click below to download

Monday 16 February 2015

How to use graphics.h in ubuntu

Follow following steps to run graphics programs in ubuntu

Step 1: You need to install the dependencies so that all the required compiler tools gets installed. For that you need to run the given command on the terminal:


sudo apt-get install build-essential

      If you are getting error after executing above command run following command else goto step 2.
         It might give an error in ubuntu 14.04 line package not found. In that case you need to add repository for that execute following command:

 sudo add-apt-repository "deb http://archive.ubuntu.com/ubuntu $(lsb_release -sc) main universe"

 sudo apt-get update

 sudo apt-get install build-essential


Step 2: You need to install some packages. They are: libsdl-image1.2, libsdl-image1.2-dev, guile-1.8 and guile-2.0-dev. For that run the given command at the terminal one by one :

sudo apt-get install guile-2.0-dev

sudo cp -r /usr/include/guile/2.0/* /usr/include/ 

sudo apt-get install libsdl1.2-dev

sudo apt-get install libsdl-image1.2-dev

sudo apt-get install libsdl2-dev

sudo apt-get install libsdl2-image-dev


Step 3: Now, download and install libgraph-1.0.2.tar.gz from the [Official link]  [Mirror]:
Download this file in any folder and extract it in the home folder or on the desktop wherever you want.
Open the terminal and navigate to the folder where you have extracted libgraph-1.0.2 with the help of cd command. Install this using the commands given below:

./configure

sudo make

sudo make install

Step 4: At last run following command in terminal :

sudo cp /usr/local/lib/libgraph.* /usr/lib

Step 5: Now you able to run your graphics program in ubuntu
 to run your graphics program use following commands:

gcc filename.c -lgraph

./a.out 

Sample graphics Code :


 1
 2
 3
 4
 5
 6
 7
 8
 9
10
11
12
13
#include<stdio.h>
#include<graphics.h>

void main()
{

  int gd=DETECT,gm;
  detectgraph(&gd,&gm);
  initgraph(&gd,&gm,"");
  line(10,10,150,150);
  delay(5000);
  closegraph();
}


Saturday 27 December 2014

How to Install Eclipse on Ubuntu

Eclipse comes with many flavors (See "Eclipse Packages" @ https://www.eclipse.org/downloads/compare.php?release=luna):
  • To use Eclipse for Java programming, choose "Eclipse IDE for Java Developers" or "Eclipse IDE for Java EE Developers". You need to first install JDK. Read "How to install JDK on Ubuntu".
  • To use Eclipse for PHP programming, choose "Eclipse IDE for PHP Developers".
  • To use Eclipse for C/C++ programming, choose "Eclipse IDE for C/C++ Developers".
  • Nonetheless, you can install any package, and then add more features.
To install Eclipse (e.g, for Java Programming):
  1. Download Eclipse from http://www.eclipse.org/downloads/. Choose "Linux" 32-bit or 64-bit ⇒ "Eclipse IDE for Java Developers" (or "Eclipse Standard|Classic") for Java SE program development; or "Eclipse IDE for Java EE Developers" for developing webapps. You will receive a TAR file (e.g., "eclipse-jee-luna-R-linux-gtk-x86_64.tar.gz") in the "~/Downloads" folder.
  2. Install:
    // Unzip the tarball into /usr/local
    $ cd /usr/local
    $ sudo tar xzvf ~/Downloads/eclipse-jee-luna-R-linux-gtk-x86_64.tar.gz
          // Extract the downloaded package
          // x: extract, z: for unzipping gz, v: verbose, f: filename
          // You can also unzip in "File Explorer" by double-clicking the tarball.
     
    // Change ownership
    $ cd /usr/local
    $ sudo chown -R your-username:your-groupname eclipse
          // Change ownership to your chosen username and groupname
          // -R recursive
     
    // Set up a symlink
    $ cd /usr/bin
    $ sudo ln -s /usr/local/eclipse/eclipse
          // Make a symlink in /usr/bin, which is in the PATH.
    $ ls -ld eclipse
    lrwxrwxrwx 1 root root 26 Aug 30 11:53 eclipse -> /usr/local/eclipse/eclipse
    $ which eclipse
    /usr/bin/eclipse
    $ whereis eclipse
    eclipse: /usr/bin/eclipse /usr/bin/X11/eclipse /usr/local/eclipse
To run Eclipse, open the "
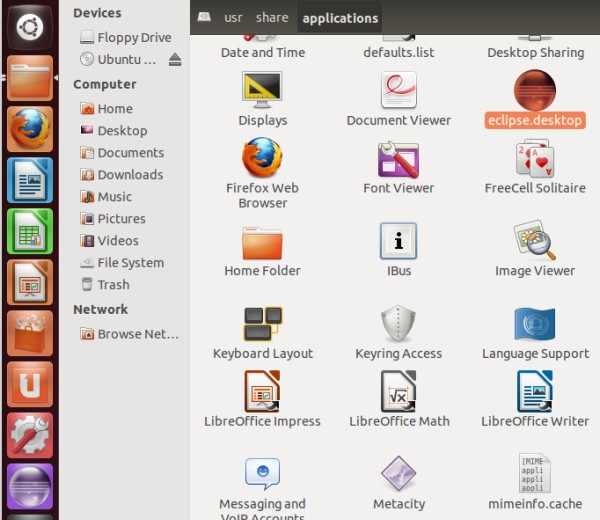
/usr/local/eclipse" folder and click on the "Eclipse" icon; or start a "Terminal", enter "eclipse".
Pin Eclipse on Launcher
To pin Eclipse on the launcher, create a /usr/share/applications/eclipse.desktop file with the following contents:
[Desktop Entry]
Name=Eclipse 
Type=Application
Exec=eclipse
Terminal=false
Icon=/usr/local/eclipse/icon.xpm
Comment=Integrated Development Environment
NoDisplay=false
Categories=Development;IDE;
Name[en]=Eclipse
Start Eclipse, right-click on the Eclipse icon on launcher ⇒ lock to launcher.

How to Install JDK 8 on Ubuntu

There are several JDK implementations available for Linux, such as Oracle JDK, OpenJDK, Sun JDK, IBM JDK and GNU Java Compiler. We shall choose the Oracle JDK 8. Ubuntu chooses OpenJDK as its default JDK, which is not 100% compatible with Oracle JDK.
Step 0: Check if JDK has already been Installed
Open a Terminal and issue this command:
 
$ javac -version
 
If a JDK version number (e.g., "javac 1.x.x_xx") appears, JDK has already been installed. You can skip the installation and goto step 2.
To remove OpenJDK, issue command:
$ sudo apt-get purge openjdk-\*
Step 1: Download and Install JDK
  1. Goto JDK (Java SE) download site @ http://www.oracle.com/technetwork/java/javase/downloads/index.html. Select "Java SE 8u{xx}" ⇒ JDK ⇒ Download ⇒ "Accept License Agreement" ⇒ Select Linux x86 (for 32-bit system) or Linux x64 (for 64-bit system) "tar.gz" package, e.g., "jdk-8u{xx}-linux-i586.tar.gz". (To check your OS version, goto "Settings" ⇒ "Details"; or issue command "file /sbin/init".) The tarball will be stored in folder "~/Downloads", by default.
  2. We shall install JDK under "/usr/local/java" (or Ubuntu's default JDK directory /usr/lib/jvm). First, create a directory "java" under "/usr/local". Open a Terminal and issue these commands:
    $ cd /usr/local
    $ sudo mkdir java
    Extract the downloaded package (Check your downloaded filename!)
    $ cd /usr/local/java
    $ sudo tar xzvf ~/Downloads/jdk-8u{xx}-linux-x64.tar.gz
           // x: extract, z: for unzipping gz, v: verbose, f: filename
    JDK shall be extracted in a folder "/usr/local/java/jdk1.8.0_{xx}", where {xx} is the upgrade number.
  3. Inform the Ubuntu to use this JDK/JRE:
    // Setup the location of java, javac and javaws
    $ sudo update-alternatives --install "/usr/bin/java" "java" "/usr/local/java/jdk1.8.0_{xx}/jre/bin/java" 1
          // --install symlink name path priority
    $ sudo update-alternatives --install "/usr/bin/javac" "javac" "/usr/local/java/jdk1.8.0_{xx}/bin/javac" 1
    $ sudo update-alternatives --install "/usr/bin/javaws" "javaws" "/usr/local/java/jdk1.8.0_{xx}/jre/bin/javaws" 1
     
    // Use this Oracle JDK/JRE as the default
    $ sudo update-alternatives --set java /usr/local/java/jdk1.8.0_{xx}/jre/bin/java
          // --set name path
    $ sudo update-alternatives --set javac /usr/local/java/jdk1.8.0_{xx}/bin/javac
    $ sudo update-alternatives --set javaws /usr/local/java/jdk1.8.0_{xx}/jre/bin/javaws
    The above steps set up symlinks java, javac, javaws at /usr/bin (which is in the PATH), that link to /etc/alternatives and then to JDK bin directory.
    The "alternatives" system aims to resolve the situation where several programs fulfilling the same function (e.g., different version of JDKs). It sets up symlinks thru /etc/alternatives to refer to the actual programs to be used.
    $ cd /usr/bin
    $ ls -ld java*
    lrwxrwxrwx 1 root root 22 Mar 31 20:41 java -> /etc/alternatives/java
    lrwxrwxrwx 1 root root 23 Mar 31 20:42 javac -> /etc/alternatives/javac
    lrwxrwxrwx 1 root root 24 Mar 31 20:42 javaws -> /etc/alternatives/javaws
     
    $ cd /etc/alternatives
    $ ls -ld java*
    lrwxrwxrwx 1 root root 40 Aug 29 18:18 java -> /usr/local/java/jdk1.8.0_20/jre/bin/java
    lrwxrwxrwx 1 root root 37 Aug 29 18:18 javac -> /usr/local/java/jdk1.8.0_20/bin/javac
    lrwxrwxrwx 1 root root 42 Aug 29 18:19 javaws -> /usr/local/java/jdk1.8.0_20/jre/bin/javaws
  4. To verify the JDK installation, issue these commands:
    // Show the Java Compiler (javac) version
    $ javac -version
    javac 1.8.0_20
     
    // Show the Java Runtime (java) version
    $ java -version
    java version "1.8.0_20"
    Java(TM) SE Runtime Environment (build 1.8.0_20-b26)
    Java HotSpot(TM) 64-Bit Server VM (build 25.20-b23, mixed mode)
     
    // Show the location of javac and java
    $ which javac
    /usr/bin/javac
    $ which java
    /usr/bin/java
  5. To use Java under Firefox, you need to enable the so-called "Java Plugin for web browser".
    $ cd /usr/lib/mozilla/plugins
    // if this directory does not exist, create it
    $ sudo mkdir -p /usr/lib/mozilla/plugins
    Then, create a symbolic link to your Mozilla plugins folder, (check your JDK folder)
    $ cd /usr/lib/mozilla/plugins
    $ sudo ln -s /usr/local/java/jdk1.8.0_{xx}/jre/lib/amd64/libnpjp2.so
    To verify the installation, restart your Firefox and issue URL "about:plugins".Check for Java plugins with the correct version.
    Starting from JDK 1.8u??, to run unsigned applets, you need to set security level to "high" add the sites to the "Exception List" (under the Java Control Panel ⇒ Security). To start the Java Control Panel:
    $ cd /usr/local/java/jdk1.8.0_{xx}/jre/bin
    $ ./ControlPanel      // OR ./jcontrol
    
    You need to restart Firefox after modifying the Exception List.
  6. [Don't Do this step - taken care by "alternative" in Step 3. Keep here to show you how to set PATH.] Add JDK's binary directory ("bin") to the "PATH" by editing "/etc/profile":
    $ cd /etc
    $ gksudo gedit profile   // OR "sudo nano profile" to use the console-based nano editor
    Add these lines at the end of the file "/etc/profile", replace "{xx}" with the actual number:
    export JAVA_HOME=/usr/local/java/jdk1.8.0_{xx}
    export PATH=$JAVA_HOME/bin:$PATH
    Rerun the configuration file by:
    $ source /etc/profile
     
    // Check the new settings for JAVA_HOME and PATH
    $ echo $JAVA_HOME
    /usr/local/java/jdk1.8.0_{xx}
     
    $ echo $PATH
    .....:/usr/local/java/jdk1.8.0_{xx}/bin
Step 2: Compile and Run a Hello-world Java Program
  1. Open "Folder" and create a new directory called "myProject" under your home directory to keep all your works.
  2. Open "Text Editor" (gedit). Enter the following source code and save as "Hello.java" under the "~/myProject" directory created earlier.
    public class Hello {   // To save as "Hello.java" under "~/myProject"
       public static void main(String[] args) {
          System.out.println("Hello, world from Ubuntu!");
       }
    }
  3. To compile the Hello-world Java program, launch a Terminal and issue these commands:
    // Change directory to where the source code resides
    $ cd ~/myProject
     
    // List the contents of current directory. Check for "Hello.java"
    $ ls
    ...... Hello.java ....
     
    // Compile "Hello.java" into "Hello.class"
    $ javac Hello.java
     
    // Check for "Hello.class"
    $ ls
    ...... Hello.class ....
     
  4. Run the Hello-world Java program:
    // Run "Hello.class"
    $ java Hello
    Hello, world from Ubuntu!


Saturday 25 October 2014

DELD SOLUTIONS PDF FREE DOWNLOAD

HERE IS LINK TO DOWNLOAD DELD SOLUTION FREE OF COST

TYPICAL QUESTIONS & ANSWERS CONSIST OF DIFFERENT PART LIKE

1.OBJECTIVES QUESTIONS
2.NUMERICALS
3.DESCRIPTIVES

WHICH MAY HELPFUL FOR EXAMS !

DOWNLOAD DELD SOLUTIONS FROM HERE

https://drive.google.com/file/d/0BzbuE6BfgoRbUXJ4NjdxcUg0WG8/view?usp=sharing
 

Monday 6 October 2014

VHDL Assignments of DELD

All VHDL Program source code

https://drive.google.com/file/d/0BzbuE6BfgoRbdUdqZUxMbTkxeTA/view?usp=sharing


ModelSim 5.5e Portable

ModelSim 5.5e portable simulator to run VHDL Programs


After Downloading extract the compressed file anywhere you want then goto win32 folder and run modelsim.exe


Download ModelSim 5.5e 

https://drive.google.com/file/d/0BzbuE6BfgoRbdUtud3FoN1VuZ0U/view?usp=sharing

Steps To Execute VHDL program in ModelSim


1. Write program
Goto file>new>source>vhdl

2. New window will appear then type code and save it on desktop (recommended)

Thursday 2 October 2014

Wednesday 1 October 2014

Download ModelSim

Download ModelSim 6.2c including Keygen

http://www.4shared.com/rar/GHu-fPQF/ModelSimSEv62c_incl_Keygen.html?locale=en

Note: on next page Click on Download button not on priority download. 

Saturday 27 September 2014

How to install eclipse in ubuntu 12.04

Eclipse installation in ubuntu 12.04 is very simple . you can install eclipse using “software center” but you may not get the latest version, better download the latest version and install manually . Here we can see how to install eclipse in ubuntu manually .
install eclipse ubuntu 12.04

Installing eclipse in ubuntu 12.04

Step 1 » Before installing eclipse you need to install java , you can either install JRE or JDK .
krizna@leela:~$ sudo apt-get install openjdk-7-jre
[or]
If you are going to use eclipse for java development, then you can install JDK
krizna@leela:~$ sudo apt-get install openjdk-7-jdk
Step 2 » Download the latest eclipse package from here http://www.eclipse.org/downloads/?osType=linux
Step 3 » move the package to the /opt directory
krizna@leela:~$ sudo mv eclipse-SDK-4.2.2-linux-gtk.tar.gz /opt/
Step 4 » Unzip the package by typing the below command
krizna@leela:~$ cd /opt
krizna@leela /opt:~$ sudo tar -xvf eclipse-SDK-4.2.2-linux-gtk.tar.gz
Step 5 » Create a new desktop file eclipse.desktop in /usr/share/applications/ and add the below lines .
Step 6 » Now goto /usr/share/applications and find eclipse.desktop file for launching eclipse , you can drag this file to the launcher.
install eclipse ubuntu 12.04

All PL Assignments

Download All PL Assignments

https://drive.google.com/folderview?id=0BzbuE6BfgoRbcng1UVk1UlFpUkk&usp=sharing


Ads Inside Post